Easily optimize blog post preview images
Use the right size, format, and LQIP for fast landing pages in Chirpy theme for Jekyll and more.

Intro
When a blog index page loads, one of the heaviest items to download are the post preview images. Here are a few tips and tricks to optimize them, so that your blog is as fast as possible.
The Chirpy theme for Jekyll is a great example because it handles LQIP automatically. Some tips are specific to this theme, but the principles are generally applicable, as long as your blog supports similar functionality.
Image size
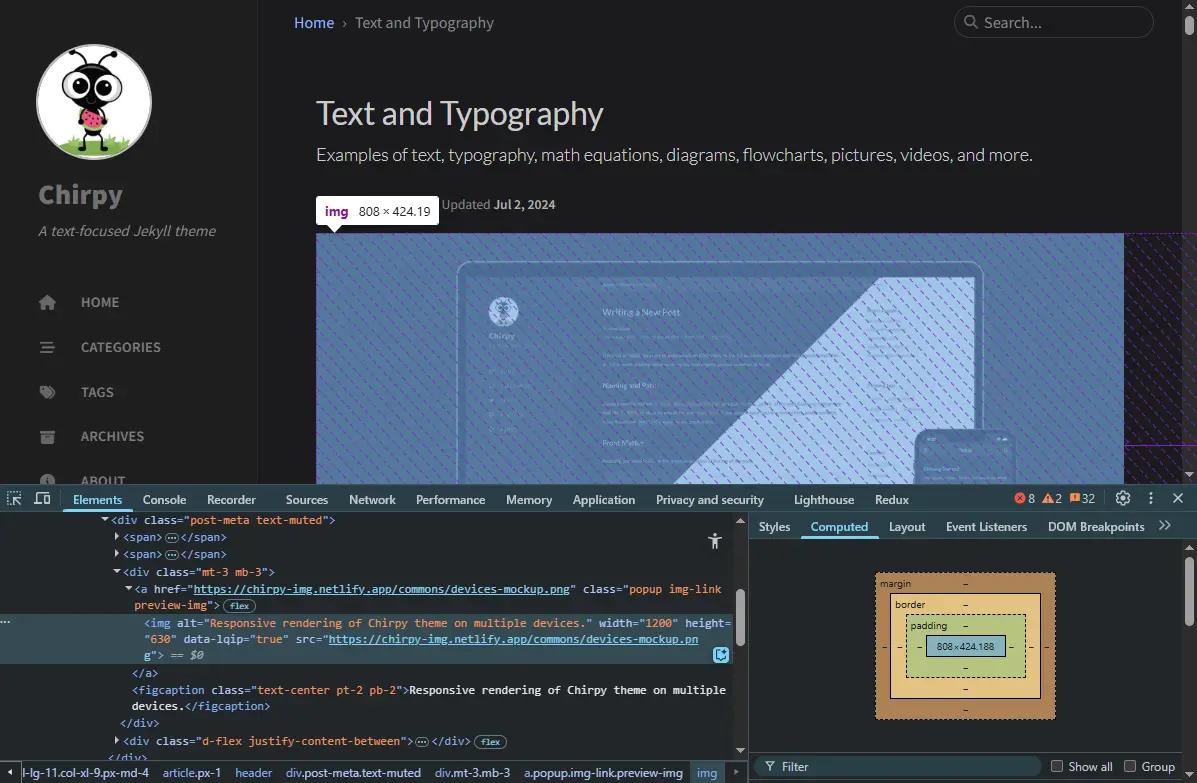
For example, in the Chirpy theme post preview images are 1200x630px if you check out the markup, and you’d be tempted to use that size, but actually the image is 792x416px at a typical 1080p screen resolution because of the styling. If you resize the window down to 1199px width, the right column collapses and the image grows to 808x424px, and I haven’t found a larger size of it in other circumstances.
On landing pages there are 10 such images if you haven’t changed the default Chirpy starter settings, so any bandwidth waste here is made tenfold for first time visitors to your blog. Therefore, you should check your blog for the actual maximum size at which post preview images are displayed, and make sure the source images are no bigger than that. If you use separate thumbnails, even better.
One very simple and free online image resizer is this one from Adobe, I recommend giving it a try. If you don’t like it, there are tons of alternatives just a quick search away.
Your post preview images should not be bigger than the largest size at which they are actually used. For Chirpy users,
808x424pxis a good size to consider. The Adobe image resizer is a simple tool to use.
Image format
When you dive into image compression approaches and algorithms you enter a world on its own. For instance, lossless WebP images are reportedly 26% smaller than PNG, and lossy ones are 25-34% smaller than equivalent JPEG. However, lossy WebP can easily obtain a 75% or more reduction compared to PNG, which is a big deal.
A simple tool such as this one is all you need for a quick conversion, or you can search around for fancier, more configurable alternatives.
Use
WebPimages which are much smaller at very good quality. Tinyfy is a free and simple online conversion tool.
LQIP
LQIP stands for Low Quality Image Placeholder and it’s meant to be the smallest possible placeholder for your post preview image, meant to be inlined with the article. In Jekyll these are tiny base64 encoded images, and in Chirpy they have a dedicated lqip front matter field where they can be specified. These images are replaced by their full size counterparts as they finish downloading, using a simple fade effect. Note that this might be overkill and an unnecessary optimization if your preview image is already small (e.g. under 10kb).
As with image formats there are many LQIP generators to choose from, some easier to set up than others. But for a quick job my favorite LQIP generator is ThumbHash. This is how you can do it in Chrome (or other Chromium-based browsers such as Edge, Brave, etc.):
Uploadyour picture- Right-click the result, click
Inspect - Make sure the
<canvas>element is selected, then go to theConsoletab - Run this command:
$0.toDataURL()($0is a reference to the selected node in theElementstab) - Right-click the result and
Copy string contents Pasteit into your post’slqipfront matter field
LQIPimages speed up landing pages dramatically, but they need support from your blog implementation. ThumbHash is an easy way to generateLQIPs ready to use in Chirpy.
Conclusion
Frontend developers have no excuse for slow loading blog pages due to heavy images. Especially when there are three simple things you can do about it:
- Resize your images to the size they will be used at.
- Compress them using
WebPto get the smallest files. - Use
LQIPs to deliver landing pages as fast as possible.
Thank you for reading!